
Login and Registration form in Android and validation (is EditText empty and is the string email an email) are part of every app.
This days Login and Registration form in Android are part of every application out there. So, when we are programming, we work with many registration forms. Forms can be very different from a simple login or registration to a complex ordering form for a mobile store. That is why we at MPEMBA TECH decided to tell you more about it.
First, we are going to show you how to make a registration form in Android. In the second part, we will show you how to make a login form.
With registration, we explain how you can check data that the user has entered with simple validation. Validation can check many conditions. In this example, we verify if an email address is a valid email and if a user entered all the required data, for instance, we check if EditText is empty for the first and last name. We have prepared a way to notify the user that the data is not valid. On login activity, we show how to check if a password is long enough.
There are a few things login and registration form need:
- Clean user interface.
- Validation (check if the email is an email and if the user entered all the data).
- Notifications for the user that the data is incorrect.
- Instructions for the user (e.g. how many characters are required for password).
Make a registration form in Android
We make a simple layout to display all the components we need for registration. We explain how to make the layout in the Layout Editor. Read our blog post about Android Studio Layout Editor if you want to learn more about Android Layout Editor.
1. First, we create a new project and add an empty activity.
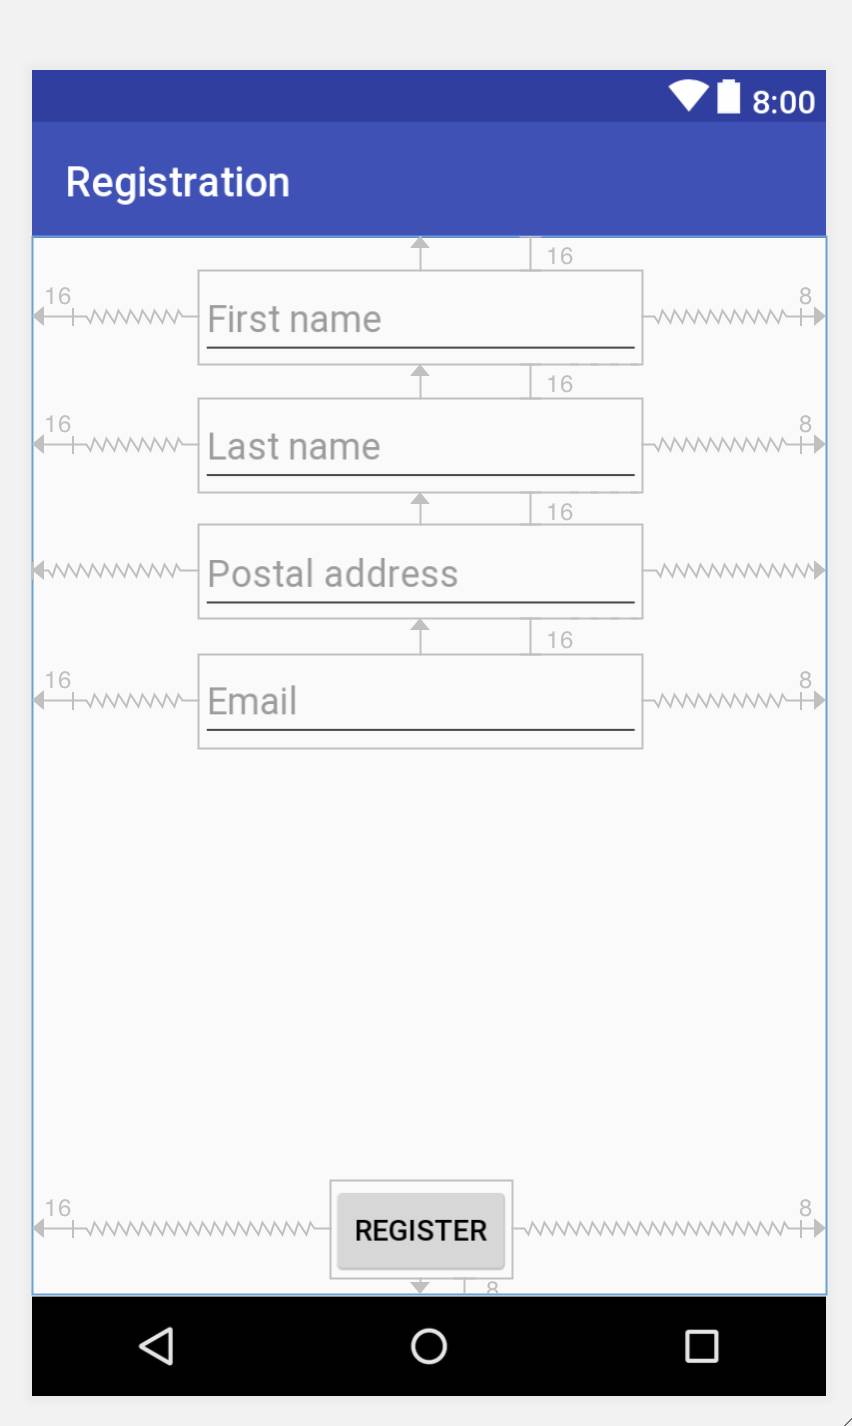
2. We use ConstraintLayout for this sample, check for all the constraints after you finish, a picture of our layout with constraints is below (after the last step).
3. Add the first EditText for the first name.
- Name it "firstName" (use the id attribute to name the component).
- Set text to "".
- Set hint to "First name".
- This one should have 3 constraints; one links to the top of the screen, second to left border and third to the right border.
4. Add EditText for the last name.
- Name it "lastName".
- Set text to "".
- Set hint to "First name".
- This one should have 3 constraints; one linked to the bottom of "First name", second to left border and third to the right border.
5. Add EditText for postal address.
- Name it "address".
- Set text to "".
- Set hint to "Postal address".
- This one should have 3 constraints; one linked to the bottom of "Last name", second to left border and third to the right border.
6. Add EditText for email.
- Name it "email".
- Set text to "".
- Set hint to "Email".
- This one should have 3 constraints; one linked to the bottom of "Postal address", second to left border and third to the right border.
7.Add a Button for registration.
- Name it "registration".
- Set text to "Registration".
8. Your final layout should now look something like this:
Linking components from layout to the code
Linking layout and code (activity_main.xml and MainActivity.java) is one of the main tasks in programming an application. This is the way we tell the code where the components. Once we link the variables with components, we can change the attributes and read the values that user entered.
9. Let's go to the MainAcitvity.java
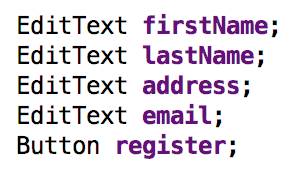
10. Declare all the variables we need for our elements on the screen, put these variables at the beginning of the MainActivity class, just after the declaration (of the class).
JAVA
11. Next, we need to find all the controls and set value to variables in our activity. In fact, we do this in the onCreate method just after the line "setContentView(R.layout.activity_main);"
JAVA

JAVA

11. Next, we need to find all the controls and set value to variables in our activity. In fact, we do this in the onCreate method just after the line "setContentView(R.layout.activity_main);"
JAVA

How to check if data is valid for registration form in Android
Now we have all the code we need to start writing the validation functionality. We have variables for all the components, and we can check the values the user enters. We do this in a central validation function, called checkDataEntered, but first, we need a listener for the click on the register button.
12. Add a new onClickListener to our button after the code that finds elements on our activity.

- Inside onClick you put only one line, a call for checkDataEntered. Consequently it is red because the function named checkDataEntered does not exist yet. Hence, when we implement this function, this line turns black.
13. We now write a template for the method that checks data entered for the whole form (checkDataEntered). We check 3 conditions: if the first name and last name are both entered, and the last condition is if the email is valid. For the first name, we show a toast to remind the user that the first name is a necessity, for the last name and email we show an error (exclamation mark in the EditText control)


Let's check if EditText is empty?
Checking if the user entered data is one of the essential validations. In fact, this way, you have control over empty values. Users want to enter as little data as possible, so they try to skip every field they can and you need to check that.
14. Let's write the first validation method, that checks if EditText is empty, named isEmpty.
JAVA

- The method takes EditText for the parameter. First, we read the value and then return the value of the function isEmpty from TextUtils class.
15. Let's use our isEmpty method and check if the user entered the first name.
JAVA

- Put this code at the beginning of our checkDataEntered method.
- To check the condition, we have to use the isEmpty method, and we pass the variable firstName (a variable that we declared earlier or in other words EditText for the first name of the user).
- We show the message on the screen if the first name is empty using a toast message.
- We make a new toast using a makeText method from the Toast class (it returns a new toast with all the appropriate values for us to use).
- The last thing we must do is call the show method for our toast (variable t).
16. Next, we check if the user entered the last name, but the code is a little bit different since we show how to set an error on EditText. Error on EditText shows an icon informing the user that data is not valid. We do this with the method setError.
JAVA

- Just as before for the first name, we first check validity using the isEmpty method and an if statement.
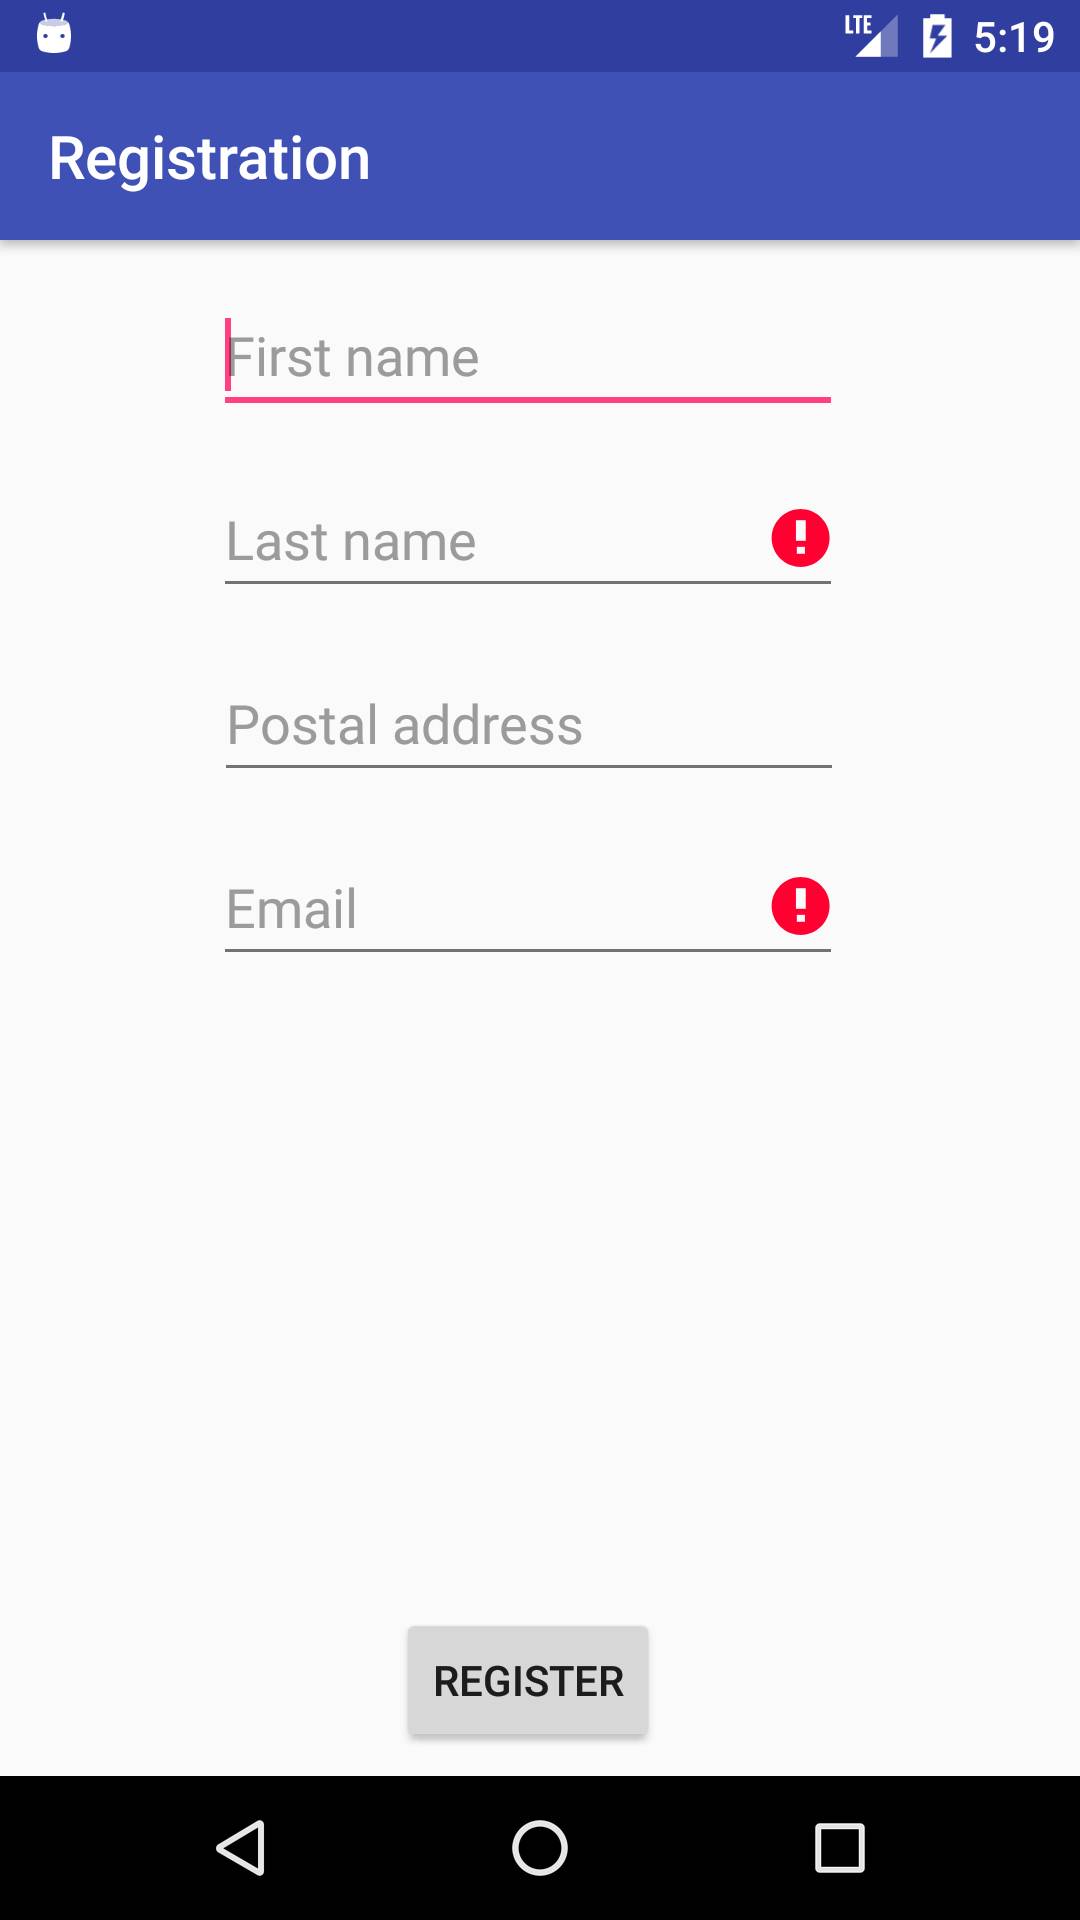
- Inside the if statement we set a message for the error and show a notification within the EditText field (see the picture below, step where we run the app).
JAVA

JAVA

JAVA

How to check if the email is valid in Android? (Java)
Checking email is harder because we usually have to check more conditions. However, we are lucky, because Android offers us an email checker right from the box with the Patterns class.
17. Let's write a method that checks if the value of EditText is an email named isEmail. Our method takes EditText as a parameter and returns a boolean. Furthermore, we need to read a string written in our EditText. We use this value to check if it is a valid email. Android has functions built-in that helps us check the values. We use the regex expressions definitions in the Patterns library. To be exact we use EMAIL_ADDRESS regex.
JAVA

- After reading the value of EditText, we return the validity of the statement. The statement is divided into 2 parts; the first one checks if the value is empty and the second one checks if the value matches an email. (Double & or && means that the first part must be true to check the second part.)
- Put this method just after our onCreate method.
18. The last check will be for validity of email that the user entered. The code for check is:
JAVA

- Put this code at the beginning of our checkDataEntered method.
- This time we use our isEmail function for checking, and we set an error if something is wrong.
- We could write the first line (isEmail... ==...) in the shorter format, but we used comparison with false for a more transparent example. If you want you can use the shorter version of checking email that looks like:
 19. If you run our app now and leave all the values empty and press Register, you should get something like this (You see errors, and the toast message appears).
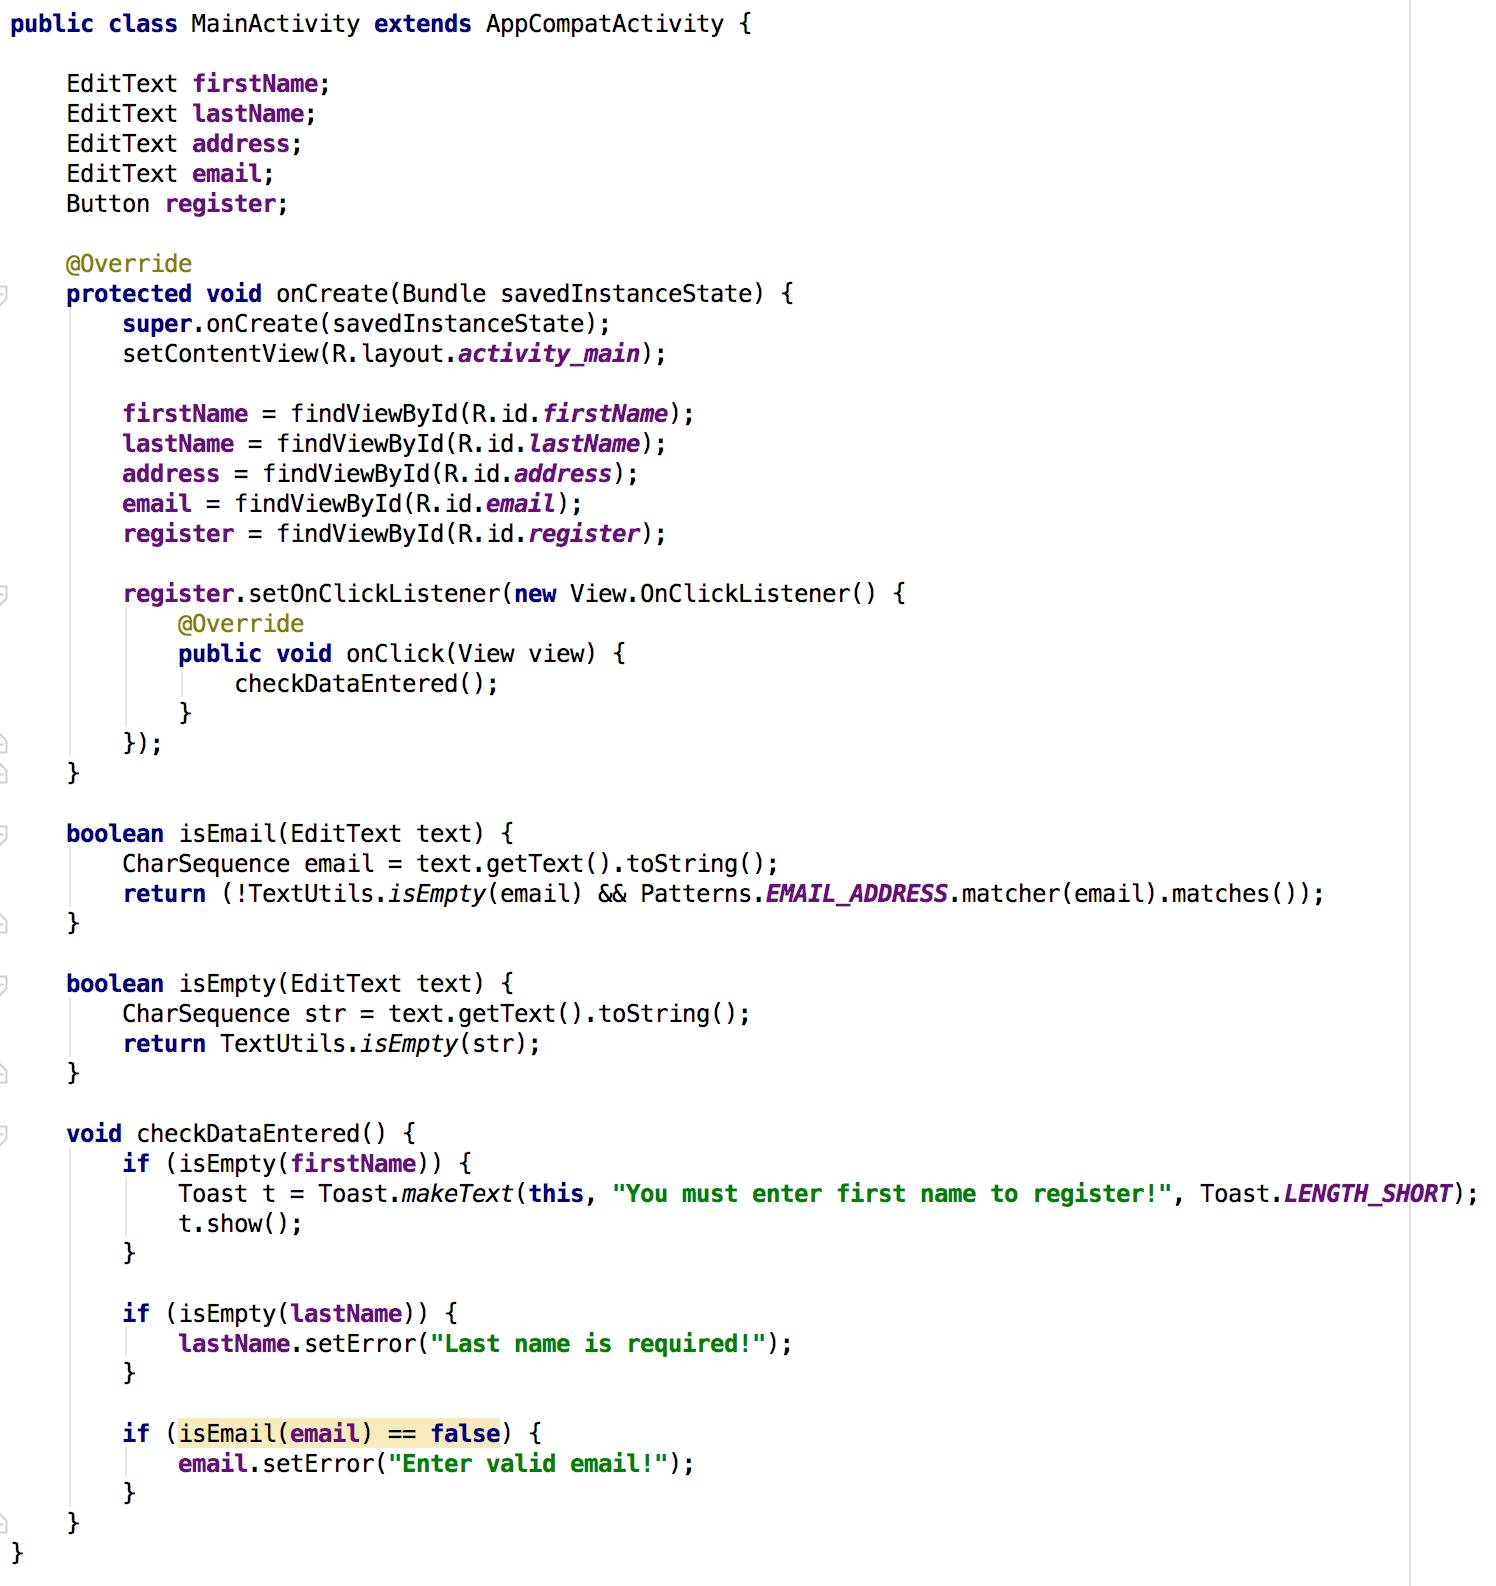
20. Final code for the registration form should look like this:
JAVA
Our registration form in Android looks excellent. It is time to prepare the Login form.
JAVA

JAVA


20. Final code for the registration form should look like this:
JAVA

Practice makes perfect
Therefore, for further practice and to enhance your knowledge about the registration form in Android, you could:
- Write a method that checks if the first name and last name are at least 3 characters long (see password check).
- Check if the first and last name do not have 3 same characters in the row (for example "aaa").
Login form in Android
Login form in Android usually consists of two fields and two buttons. In fact, we have shown how to make a layout for a registration form in Android above, and you can use this knowledge to create Login form in Android. The important thing is to name (id) EditText for username: "username" and EditText for password: "password".
Login activity should look like this:
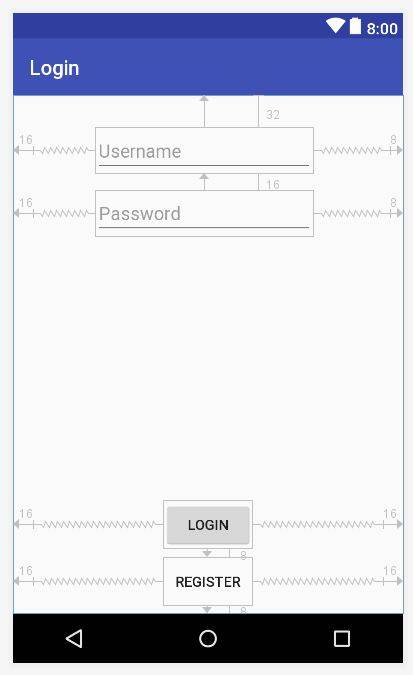 At the bottom of the screen we have two buttons, one checks login information, with the name "login", the other one is there to take us to the registration form, named "registration".

Add a FirstActivity
Now that you know how to add an activity. Add another named FirstActivity. The whole purpose of this activity is to show how to redirect to a different activity after the login is done, later in the example. Add a text if you want to show that this is the first activity or change the color of the background.
Code for Login form (LoginActivity.java)
In LoginActivity.java we add a few variables, just below class definition:
JAVA
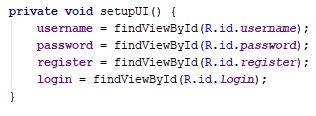
 We link all the variables in the setupUI method that we call in the onCreate method. This time we add two methods that help us prepare the login form. They are setupUI and setupListeners, with this example we show how you can organize your code (set up all the listeners in one method and link variables in the other). Let's start and add the calls for those methods in the onCreate method.
JAVA
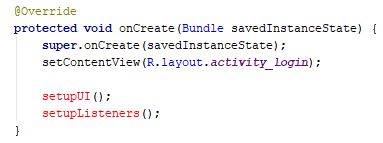 As you can see, methods are now in red, because they do not exist yet, but when we add the code, they become black.
Let's add the first method setupUI. In this method, we connect variables with elements in activity_login.xml
JAVA
 Now let's add listeners with the setupListeners method.
JAVA
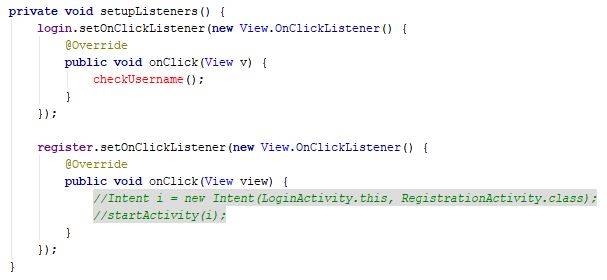 The first listener listens for a click on the login button. The second button listens for a click on the registration button. Moreover, you can see that we have a red font color for the code where we call checkUsername, this is a method that we will show later in the example. In the second listener, we have prepared all the code you need to redirect the user to the registration form.
Let's start making a template for the checkUsername method.
 We use variables to store the state of validation. If everything is OK, the value is true.
What to check for login?
- We need an email that is our username.
- The email needs to be in a proper format.
- User needs to enter a password,
- also, the smallest valid password is 4 chars long.Check data for login
JAVA

JAVA

JAVA

JAVA


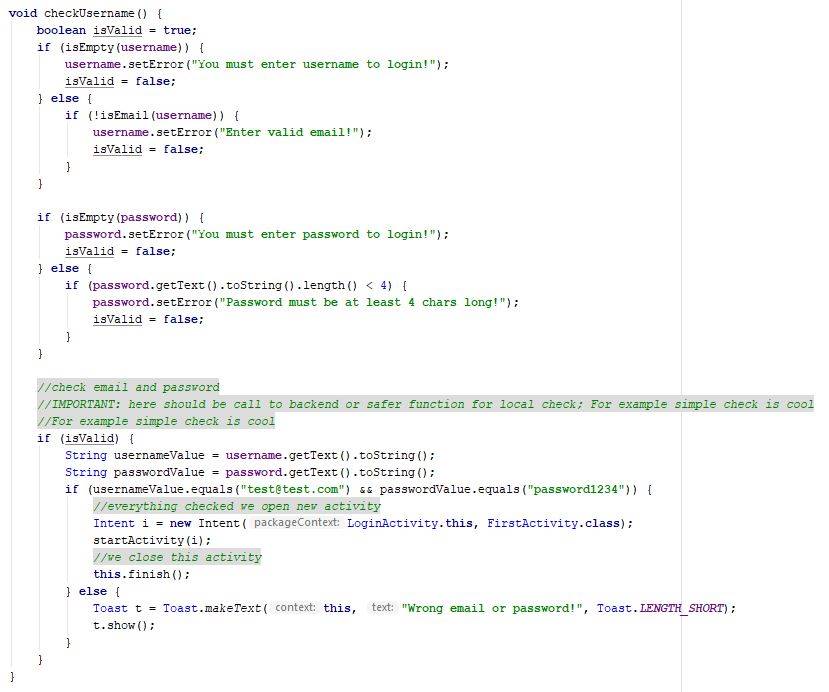
The check for the username looks like this (put this code inside the checkUsername method, below isValid declaration):
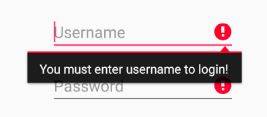
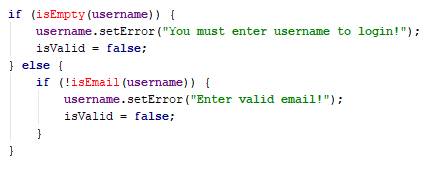 First, we check if the username is empty. Don't worry about the red code it becomes black when we add all the methods. We add this code at the end. If the username is empty, we set an error to our EditText, and Android shows an error (small icon or error message).
 When the username is empty, we also set the variable isValid to false so that we know that the state is not valid. If the user entered data then we check if the username is an email. If it is not, we also show an error on EditText.
Next, we check the password, put this code after the check for the username in the method checkUsername:


Execute login and check password and username
Now for the fun part, we check password and username and decide if the user can proceed. Remember this is a local check, and when you build a full app, you have to check the username on the server or do some other check, but we are learning the basics of creating a login, and this is enough for a demonstration.
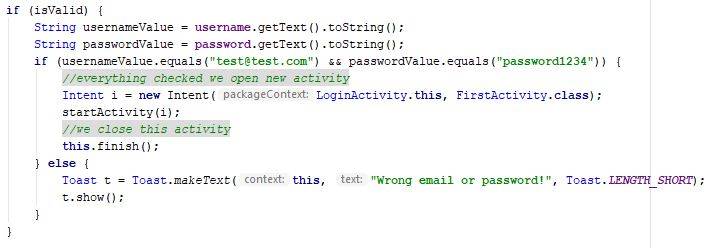
Code to check password goes into the checkUsername method as well:
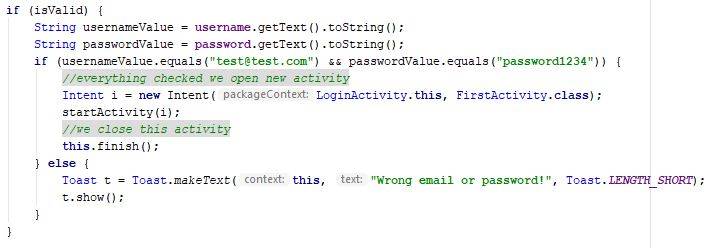 First, we check if the check is valid; this means that the user entered a username and password. Next, we create two variables to work with values of EditTexts. The last thing is to check if the username equals the values we want. In case that the values are equal and valid, we redirect the user to FirstActivity (remember, you need to create this activity). We also close this (login) activity.
If the username and password do not match, we show a Toast message.

Final code for the checkUsername function
JAVA
JAVA

Add the missing methods isEmail and isEmpty to the Login form
Copy the code from the registration form (MainActivity.java) and put it into LoginActivity.java:
JAVA
 Now you can run the code and check it out.
Completing the login form in Android for a production version of the app requires a few more things:
- Call to Login API on a server or a proper local check.
- Loading animation when we call API.
- Sometimes login application has a piece of on-boarding information about application explaining the main features of the application. Information you scroll (ViewPager).
JAVA


Post A Comment:
0 comments so far,add yours